The Stonex S10 GPS reciever has a special utility tool to calibrate the sensor's tilt compensator. This calibration tool requires multiple steps to complete and must be preformed on a data collector running Windows Mobile O/S. This guide will help users connect and complete the calibration process so the newly added tilt compensator feature can function correctly.
The first step is to transfer the Calibration Tool utility folder to the Windows Mobile data collector. This can be done by directly connecting the D/C to your desktop computer via a USB cord and having the Windows Mobile Device Center program installed. Or you can simply transfer the folder over using a USB stick or memory card depending on what the D/C has available for connection ports.
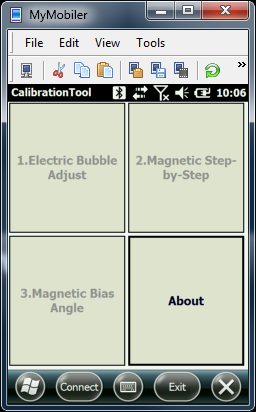
After this is completed navigate to the Calibration Utility folder and launch the app by clicking on the CalibrationTool.EXE. The screen shot below is what should be displayed when the program is first started. Notice that all options are greyed out to start except for "About". The About section will display the current version of the Calibration Tool.
Please note these calibration routines are designed to be done in the environment you wish to work in. Conducting them inside or around large magnetic fields may affect the accuracy of the calibration results.
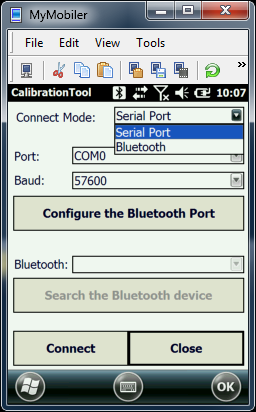
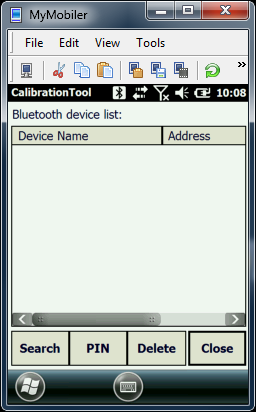
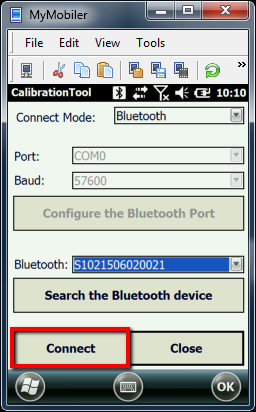
The next step is to setup the connection parameters and establish a connection to the S10 reciever. Start by pressing the "Connect" button at the bottom of the screen. This will take you to the configure connection screen shown below. Click in the "Connect Mode" pull down menu to select which connection method you wish to use. If Serial Port is chosen then it will require the correct COM port and Baud rate and a cable to connect to the device. If Bluetooth is chosen then the "Search Device" button will become active, Press this button to take you to the next screen shot shown. The device list will be empty at first, now press the "Search" button to start a Bluetooth search. A list of all devices in range will show up in the device list section as shown in the last screen shot below.
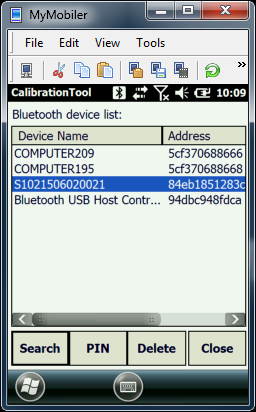
Now press the "Close" button to take you back to the Configure Connections screen. Press the pull down menu next to "Bluetooth" and select the S10 device. Note: The serial number shown in the screen shot will be different from what you see. Now press the "Connect" button to establish a connection. If the connection is succesful the utility will take you back to the calibration menu where all the options are now active.
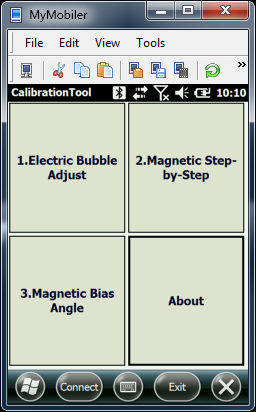
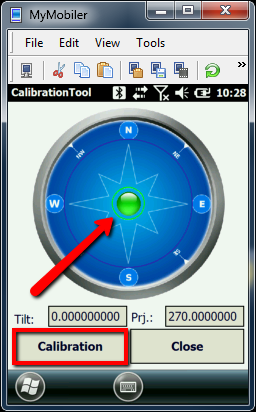
Now that the connection portion has been finished we can proceed to the next step which is to start the calibration of the Electronic Bubble. Ensure the S10 reciever is on a stable and level surface or pole. Press the first option called "Electric Bubble Adjust" to take you to the screen shot shown below. You will notice the electronic bubble is not directly in the center even though it may be perfectly level, this is normal. When you are satisfied that the S10 unit is stable and levelled, press the "Calibration" button to adjust the electronic level bubble to the centered position as shown in the second screen shot below. Press the "Close" button to bring you back to the main calibration screen.

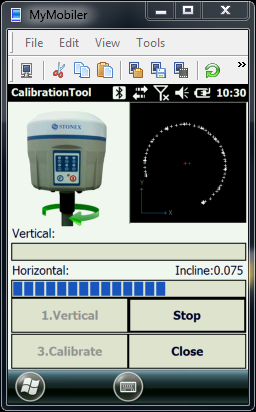
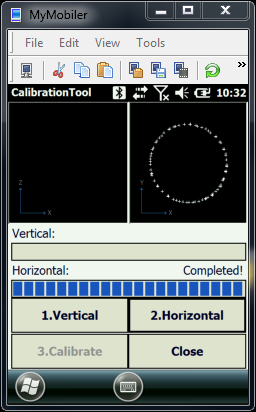
The Magnetic Step-by-Step calibration is next so click on that option to take you to the Horizontal and Vertical calibration window as shown in the first screen shot below. For the Vertical calibration you will need the special vertical bracket included with the S10 unit. After that is attached you may begin the Vertical Calibration by pressing the "Vertical" button. Once the calibration has begun SLOWLY rotate the S10 reciever around 360 degrees or until the application has confirmed it is completed the vertical calibration.
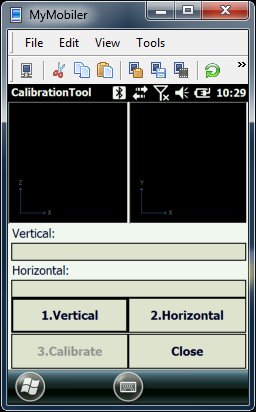
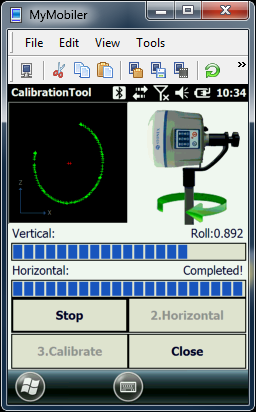
Remove the special Vertical bracket and place the S10 unit back on its tri-bracket or pole and level it. Now you can begin the Horizontal Calibration portion. Again, rotate the S10 unit SLOWLY around 360 degrees or until the process has been completed. Once both the vertical and horizontal calibrations are completed the third button labelled "Calibrate" is now active.
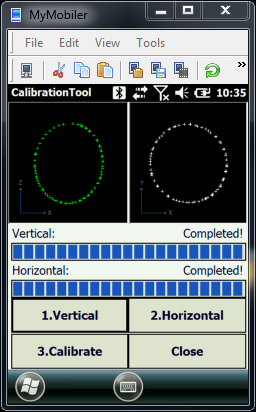
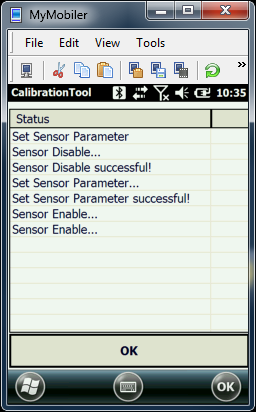
Pressing the Calibrate button will apply the changes determined by the horizontal and vertical processes and take you to a new screen shown below. After it is completed making the adjustments press the "OK" button to take you back to the Calibration menu.
The third step labelled "Magentic Bias Angle" is not needed for the tilt compensator to function in MicroSurvey's FieldGenius, Layout and EVR programs. MicroSurvey has its own settings of calculating these values within the Instrument settings/Sensor Configure section of the MicroSurvey program.
Note: For further assistance with Stonex's Calibration tool please contact Stonex Support
Jorden Friesen
Comments