Users may find the default cursor and snap marker sizing does not suit their needs, or may wish to adjust these settings for one specific drawing. MicroSurvey CAD 2016 gives users control over customizing these settings.
Part 1: Changing the cursor (Pickbox) and Aperture
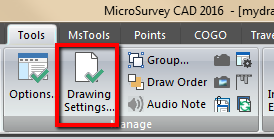
Under the Tools ribbon: Drawing settings... (Command _SETTINGS)
Under the Coordinate Input tab: Change settings for "Entity Selection" from the dropdown menu. The Pickbox and Aperture sizing can be adjusted.
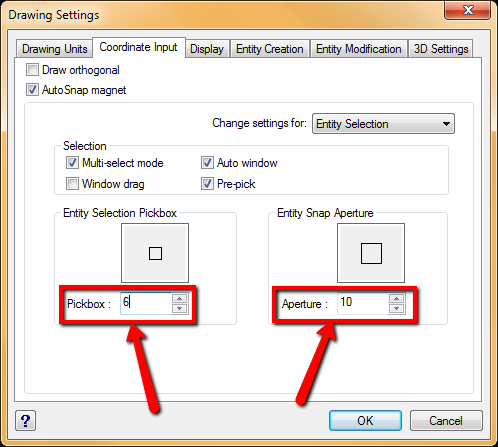
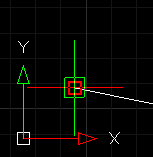
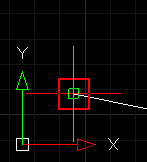
Pickbox (Command _PICKBOX): Adjusts the size of the default CAD cursor (red box). Sizing ranges from 0-50.
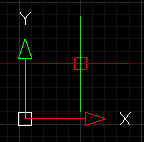
Selection Cursor size 6
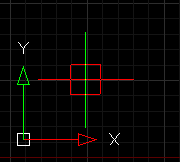
Selection Cursor size 15
Aperature (Command _APERTURE): Changes the boundary around the cursor in which the snap marker will be activated. (How close to an entity you need to place your cursor in order to activate a snap function, ranging from 1-50 pixels).
Part 2: Changing the Snap Cursor and Snap Marker
Under the tools ribbon: Options... (Command _CONFIG)
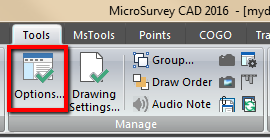
Under the Snapping tab: The size of the Snap Cursor and Snap Marker can be adjusted.
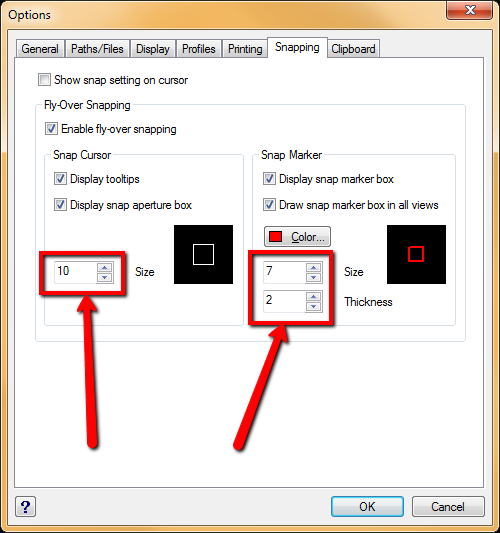
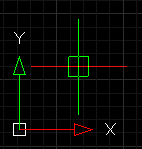
Snap Cursor: Changes the size of the snap cursor (green box) which is displayed when you enter snapping funtion. Sizing ranges from 1-20
Snap Cursor size 10
Snap Cursor size 3
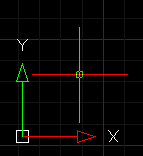
Snap Marker: Changes the size of snap marker (red shape) which appears when you snap to an entity. The shape will depend on which Snap Mode you have activated, ex. Midpoint, Endpoint, etc.
Snap Cursor size 10, Snap Marker size 6, Thickness 2
Snap Cursor size 5, Snap Marker size 15, Thickness 3
James Thomas
Comments