Check out the other AutoMap Articles:
Part 1 - Part 2 - Part 3 - Part 4 - Part 5 - Part 6 - Part 7 - Part 8 - Part 9 - Part 10 - Part 11 - Part 12
Symbol Scaling Using Field Coding
AutoMap is a system of automated drafting tools that can help you organize many tasks. In general, the AutoMap routine allows you to work with your field codes and to assign attributes to points and linework as they are drawn in the CAD file.
Some functions of AutoMap include:
- Assigning a symbol of your choice on each point based on description
- Move descriptions, points, elevations, and points to a layer of a given name
- Scaling a symbol to further customize each object
- Connecting points using the line connectivity function
- Further customizing linework with specific layers and line types
This article is going to discuss symbol scaling. One AutoMap function that can be very useful in the field is scaling a symbol based on the diameter of the object. This is great for natural objects such as trees or shrubs. Follow these steps to see how this feature works.
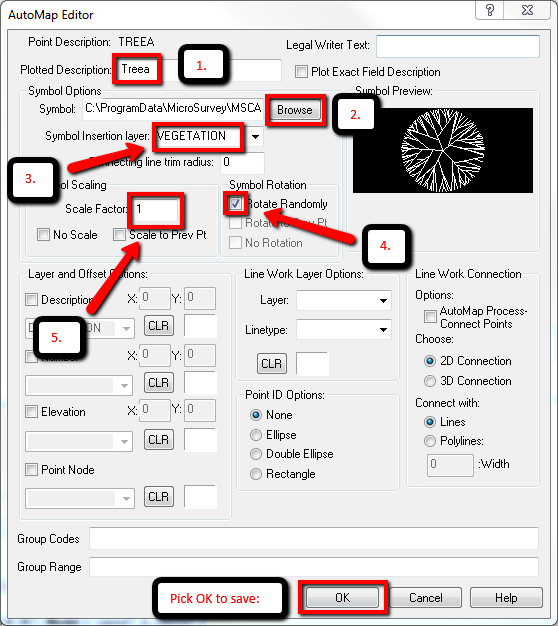
- Set the Plotted Description. This can be a more descriptive version of the short field code.
- Browse to the Symbol named R1TREEA in C:\ProgramData\MicroSurvey\MSCAD\2016\mscad\BLOCKS\R1TREEA.DWG (The R1 symbols all have a radius of 1 unit so are ideal for this example)
- Type “Vegetation” for the Symbol insertion layer. This will create a new layer when a point with this code is imported into your drawing.
- “Rotate Randomly” is a good setting for natural objects as it does not make the symbols appear identical.
- Leave the Scale factor setting at 1
Symbol Scale (-S)
You can add –s# where # is the point number of a point you store in the field. It will have the effect of scaling the inserted symbol by the #. For example, if I wish to plot a tree with a 5 foot radius I will:
- Measure the distance from the furthest reach of the branches to the center of the trunk using either pacing or a pocket tape.
- Survey the location of the tree at the trunk using the total station or GPS offset.
- When prompted to store the tree point, use the TREEA code but append –s# at the end of the code, where # represents the distance you measured.
The result after I import in the office:

Try this yourself in an empty drawing by typing in the command line "editp" or from the Points Ribbon -> Store and Edit Points.
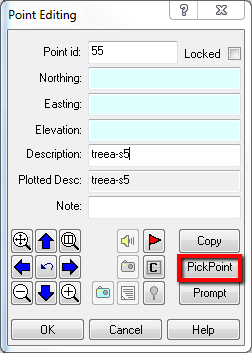
In the "Description" box type the description of the code you just created "Treea" with the letter s followed by the diameter of the tree. Then pick a point on the screen to observe in model space.
Check out the other AutoMap Articles:
Part 1 - Part 2 - Part 3 - Part 4 - Part 5 - Part 6 - Part 7 - Part 8 - Part 9 - Part 10 - Part 11 - Part 12
Olivia Floyd
Comments