Check out the other AutoMap Articles:
Part 1 - Part 2 - Part 3 - Part 4 - Part 5 - Part 6 - Part 7 - Part 8 - Part 9 - Part 10 - Part 11 - Part 12
AutoMap Line Controls
AutoMap is a system of automated drafting tools that can help you organize many tasks. In general, the AutoMap routine allows you to work with your field codes and to assign attributes to points and linework as they are drawn in the CAD file.
Some functions of AutoMap include:
- Assigning a symbol of your choice on each point based on description
- Move descriptions, points, elevations, and points to a layer of a given name
- Scaling a symbol to further customize each object
- Connecting points using the line connectivity function
- Further customizing linework with specific layers and line types
In this article we are going to cover how to use the linework functionality of AutoMap to connect points according to attributes assigned to their field descriptions. We’re also going to discuss how to control linework as it is drawn when you have a certain description associated with points.
For example load in the “survey.csv” automap located in the MicroSurvey folder.
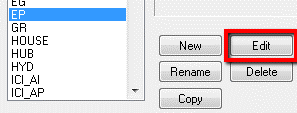
Find the Edge of Pavement (EP) in the “Descriptions” section of AutoMap. If you would like a shortcut you can just type “e” with your keyboard to get to the appropriate code. Highlight the description and click edit.
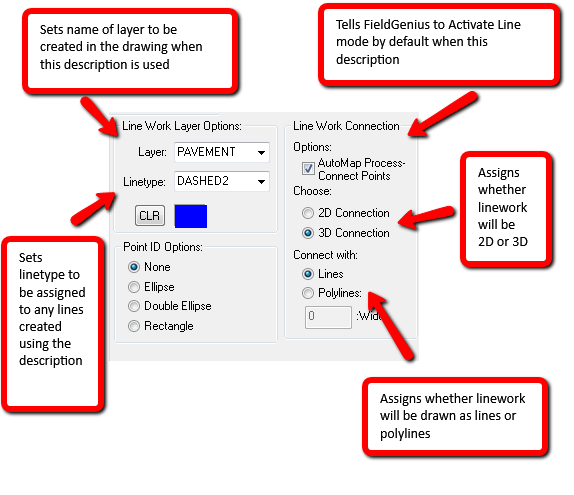
This setting affects line work automatically when you:
- Import a FieldGenius project
- When you import a Captivate project
- When you perform COGO calculations and have the "draw lines" toggle on in hot toggles.
- Connect points using XYZ linework coding
- Connect points using AutoMap Linework process or other field coding method
Here you can adjust the linetype, layer, line connections and determine if you connect with lines or polylines.
You can save the changes of your AutoMap library and use it in multiple drawings by pushing the "Save As" button in the AutoMap Editing Systen.

Here's an example of a Field Genius project:
Collect points in Field genius:

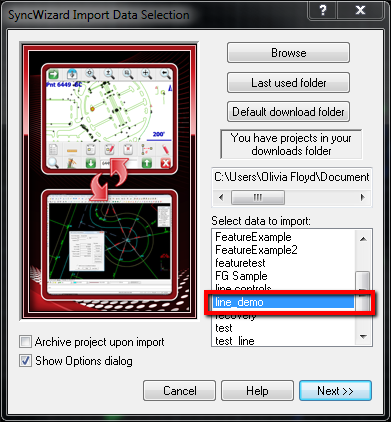
On the "Traverse" menu choose "FieldGenius SyncWizard"

Choose the Field Genius project you want to import
You have the option to break up your line work into Arcs/Lines/Polylines or have a single polyline for your linework that you collected in Field Genius

Check this report which you allow you to confirm options. Note that this project was created using the survey.csv automap and the default behaviour is for MicroSurvey to import a copy of survey.csv from your PC and apply those attributes.

If you need to make a last minute change about which AutoMap is applied you can do so here. You can also disable the drawing of points, labels etc, but be sure to turn these options back on in System Toggles after the import unless you intend to retain these settings with your project.

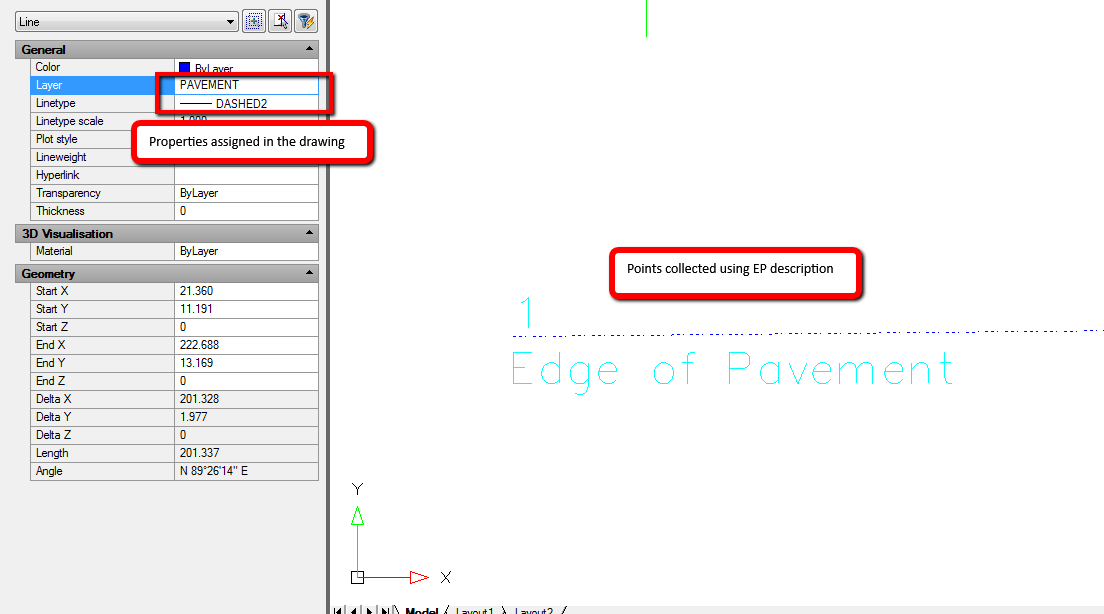
The result when you import the project into MicroSurvey CAD:
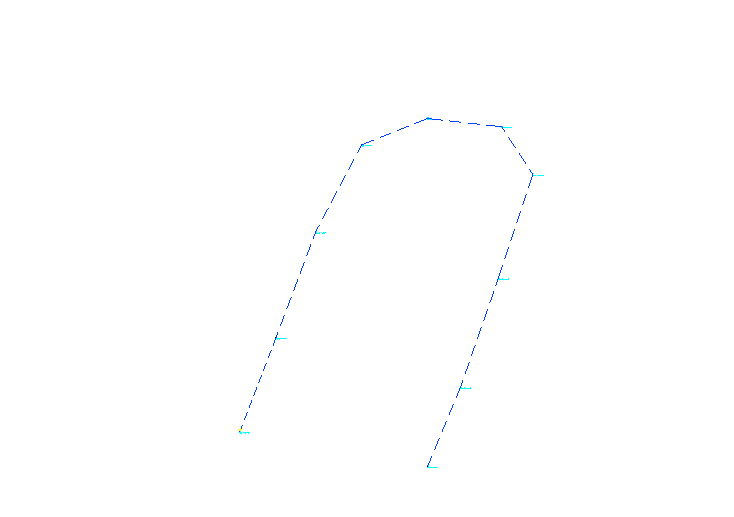
You can then examine the properties tab of the drawing to see the result when you have imported the file:
Check out the other AutoMap Articles:
Part 1 - Part 2 - Part 3 - Part 4 - Part 5 - Part 6 - Part 7 - Part 8 - Part 9 - Part 10 - Part 11 - Part 12
Olivia Floyd
Comments