In this article, we will be going over the steps to transfer your FieldGenius software with its data from one device to another. Some data may not be relevant to your workflow, and those steps can be skipped. They will have the (optional) note in the step name. This article's intent is to show how each piece of data can be transferred.
If you simply need to move a license to another device, you can deactivate the license on the old device and then re-enter the license on the new device. Both operations must take place while your device is connected to the internet.
If your old device is unavailable, follow this article.
NOTE:
Some data cannot be transferred over, such as any Instrument Profiles or customized Settings. (from the Settings menu)
So before starting this process, do take note of any relevant information you will need to recreate those profiles and settings on the new device.
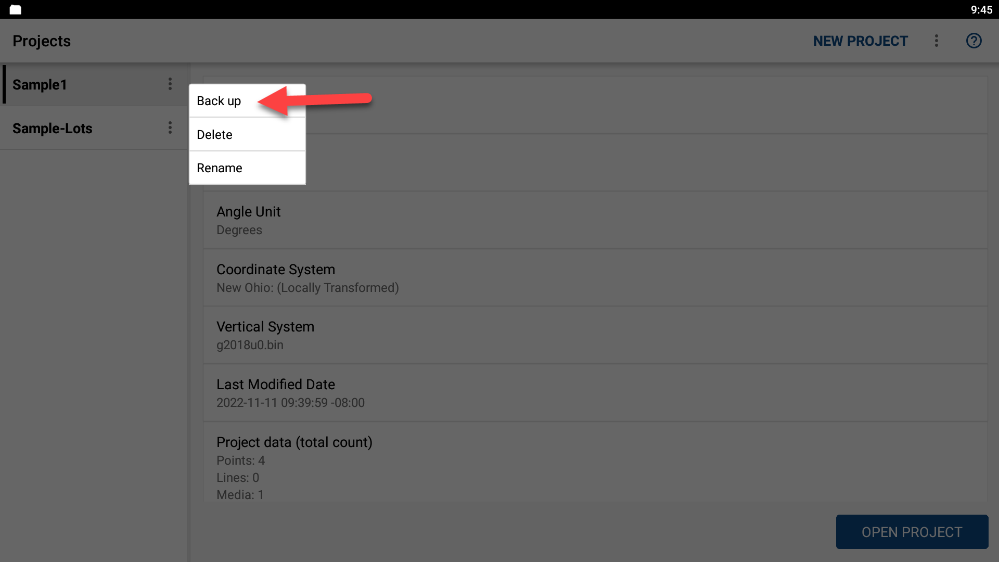
Step 1 - Backup existing projects
Any projects you wish to transfer over, use the Backup function in FieldGenius for Android. This will create an archive file that we can restore later on the new device, so save them in a location that you can access on the new device.
Google Drive is a typical method, as it could be accessed by any device signed into it.
We also have a movie that shows the process of Backup and Restore.
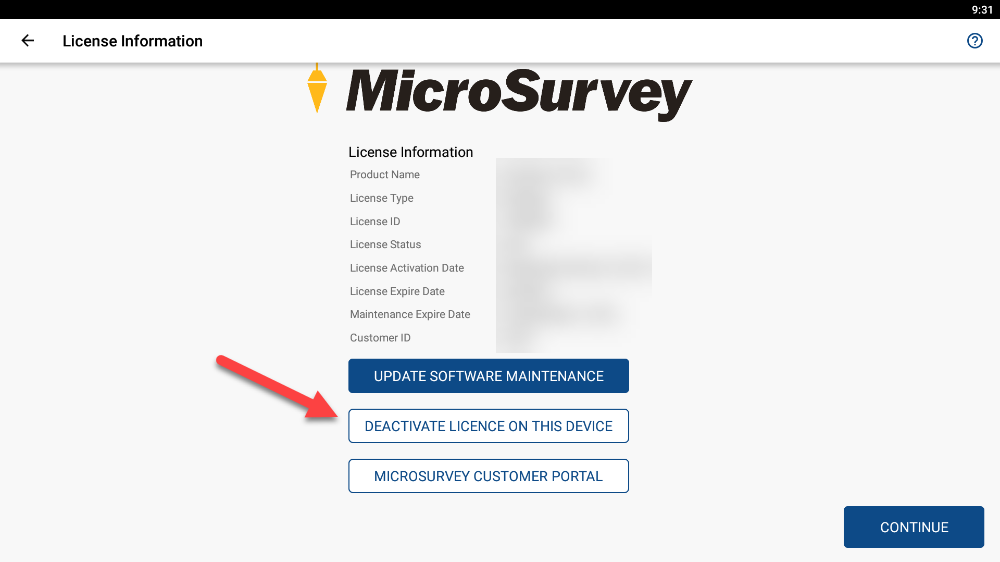
Step 2 - Deactivate your license
You will need to deactivate the license on your current device before activating it on the new device. So make sure to deactivate the license first.
If you do not have access to the old device at this stage, you can always deactivate it from your license account.

Step 3 - Backup any Imported files (optional)
Outside of FieldGenius for Android, browse to your FieldGenius folder using whatever file explorer app your device has.
Each Android device has its own app, so your screen may look a little different from the ones shown here.
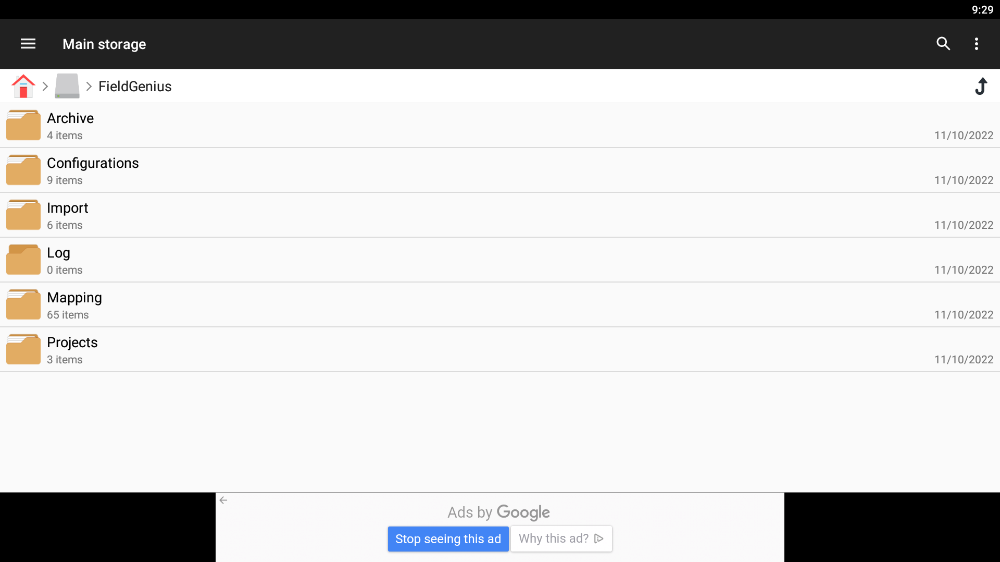
Select the Import folder and move it to a different location, somewhere you can access with the new device. Take note of where you are moving the files to.
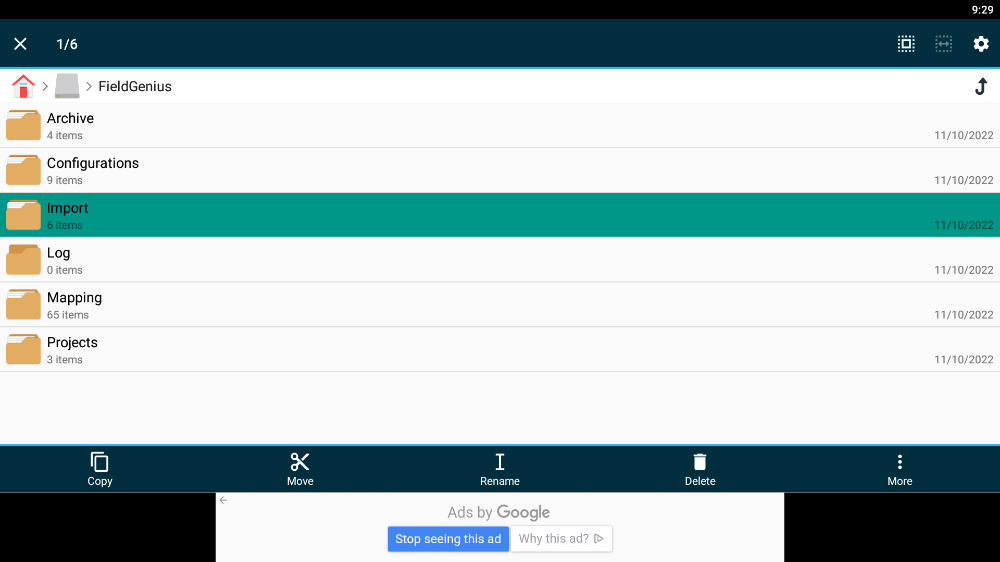
In some cases, if your file explorer app allows it, you will need to archive this folder or alternatively move each file within the folder manually.
If you do not need everything in the Import folder but just some files, move just those individual files then.
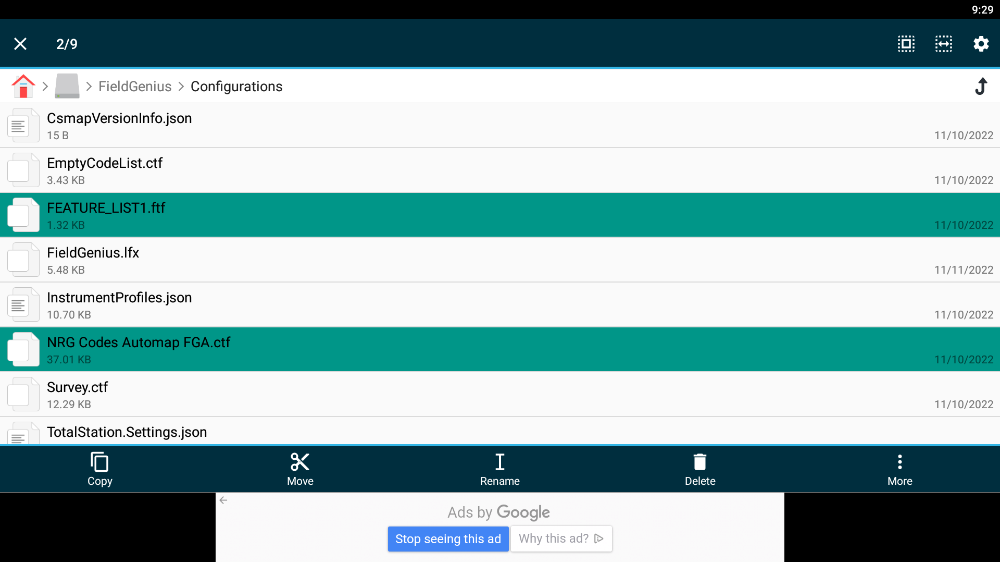
Step 4 - Backup Feature Files and Codelists (optional)
Outside of FieldGenius for Android, browse to your FieldGenius folder using whatever file explorer app your device has.
Each Android device has its own app, so your screen may look a little different from the ones shown here.
When you restore your projects later on in this article, any feature files or codelists for that project will still be in that project.
This step is just in the case where you want to use those same files for any new projects you make in the future.
Go into the Configurations folder. Here, you will see a number of system files the program uses.
Feature files have the extension (.ftf) and Codelists have the extension (.ctf)
Move them to a different location, somewhere you can access with the new device. Take note of where you are moving the files to.
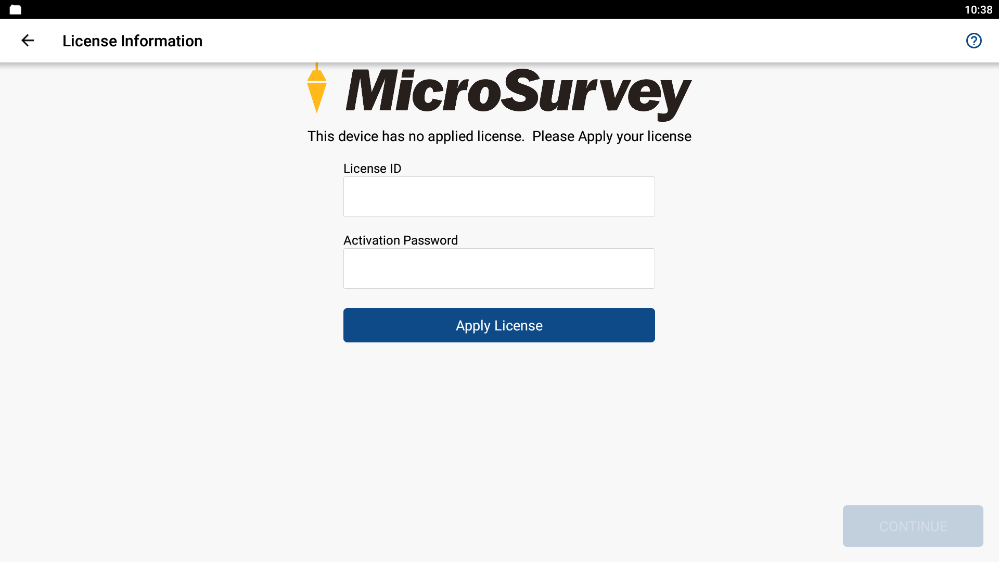
Step 5 - Install and License FieldGenius for Android on new Device
Download and install FieldGenius for Android on your new device. The latest version can be found here.
Once you launch the program, select Register and enter in your License ID and Password. The same that was deactivated on the old device.

Step 6 - Restore Imported files, Feature files and Codelists (optional)
Outside of FieldGenius for Android, browse to your FieldGenius folder using whatever file explorer app your device has.
Each Android device has its own app, so your screen may look a little different from the ones shown here.
If you backed up any Feature files and Codelist files, move them into the Configuration folder.
If you backed up any Imported files, place them into the Import folder. Or if you backed up the entire Import folder, replace the one here with your backup.
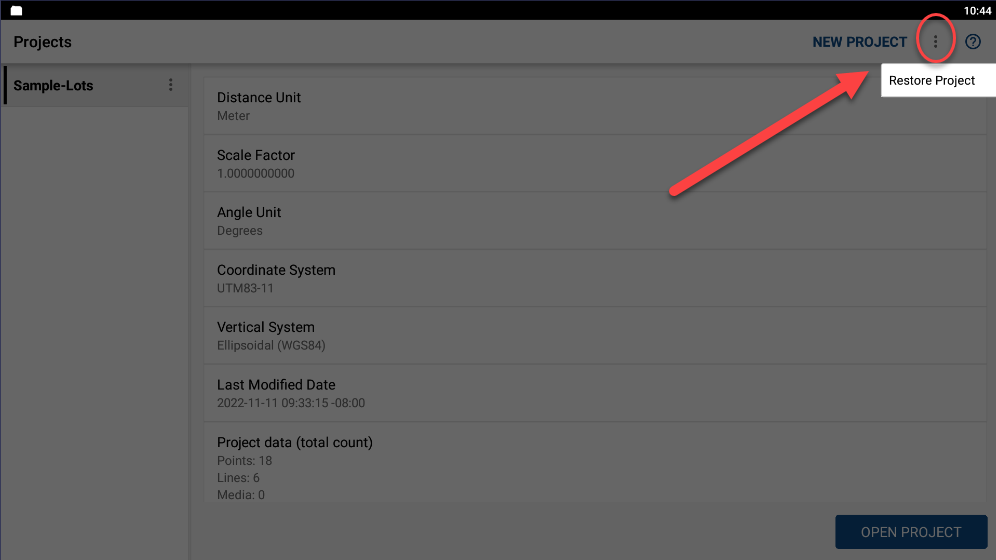
Step 7 - Restore Projects
On the project screen in FieldGenius for Android, select the (...) icon on the top right and select Restore Project
Browse to your archived projects, and restore them.
We also have a movie that shows the process of Backup and Restore.
When opening these projects, you will get a prompt to download any Geoids or Gridshift files needed for that project.
Also, if a custom coordinate system was used, that will automatically be added to the program.
Chris Clemente
Comments