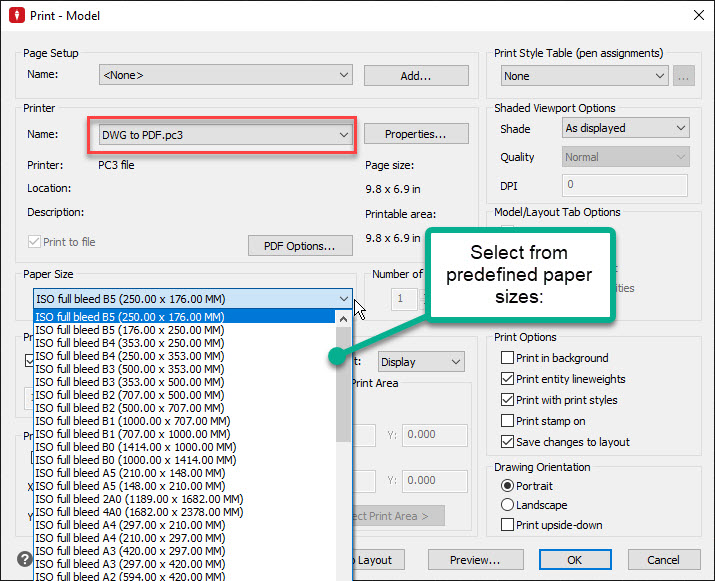
Plotting to PDF is an increasingly common method of creating deliverables and files intended for electronic submissions. MicroSurvey provides a PC3 file named "DWG to PDF" that allows you to select a PC3 file in the print dialog, select from a variety of imperial and international paper sizes and configure a print just as you would with a traditional paper plotter:
The routine will prompt you to set a location and name for the PDF file and your drawing is now available for electronic distribution.
It's important to note that if you are having technical challenges getting a physical plotter to interact with your CAD program you can also follow the alternate workflow: 1. Print PDF -> 2. Open PDF in PDF viewer -> 3. Print to paper.
If you find that the predefined DWG to PDF file does not include the required paper size you can create additional Custom Paper Sizes:
Start the Print or Plot function:
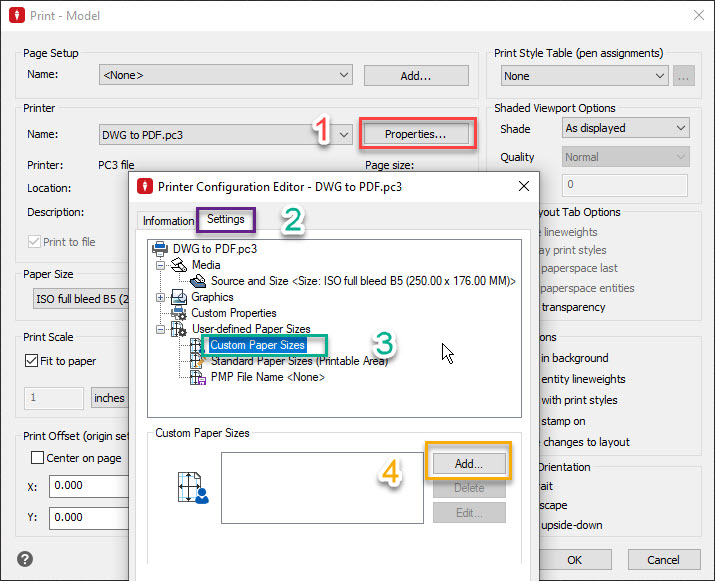
- After selecting DWG to PDF from the Printer Name dialog select Properties
- Select the Settings tab
- Expand the "+" icon next to User-defined Paper sizes and then Select Custom Paper Sizes
- Pick Add... to start defining your paper size
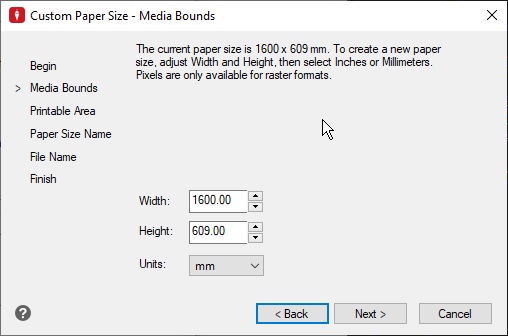
In this example we'll go through the steps of defining a metric 609mm x 1700mm paper size:
Select Add
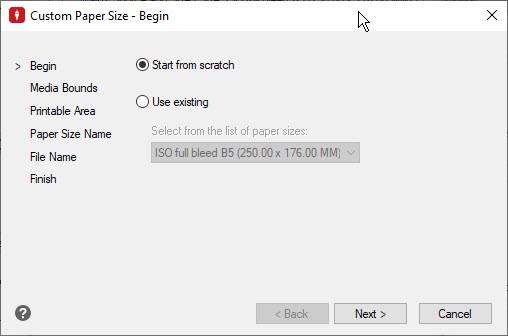
Either "Start from Scratch" or "Use Existing selection" will work, but in this case we'll work with "Start from Scratch":
Next:
Set Media Bounds and Next:
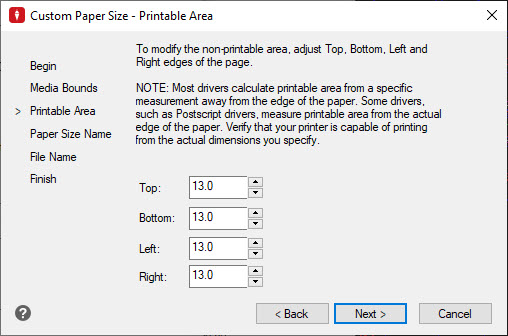
Set Printable Area. Note that you may need to compare against predefined printers that you are already familiar with to ensure you select settings that match your PDF production and physical plotter capabilities. Select Next:
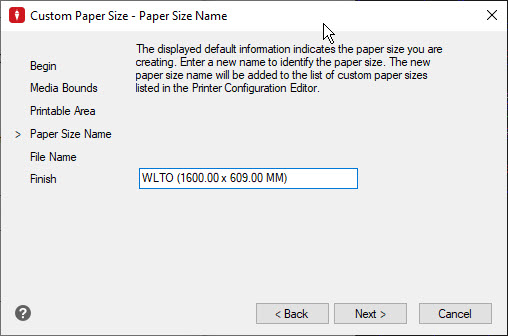
Set a name for your new paper size and Next:
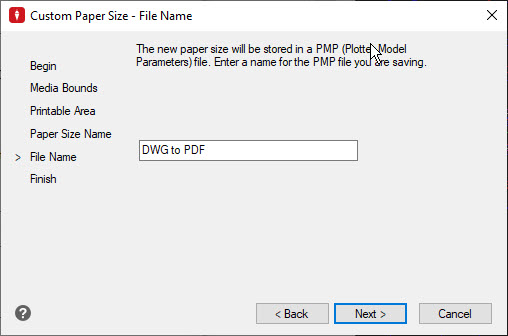
Leave the File Name entry as shown. We will set a new name once all paper sizes are defined. Next:
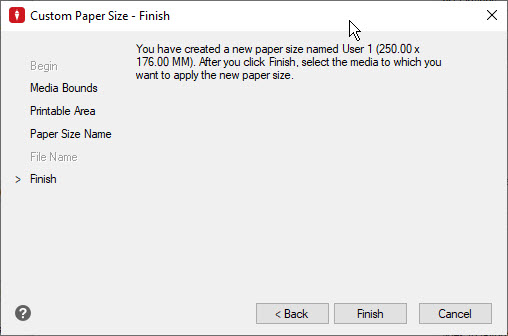
Finish:
Add any additional required paper sizes:
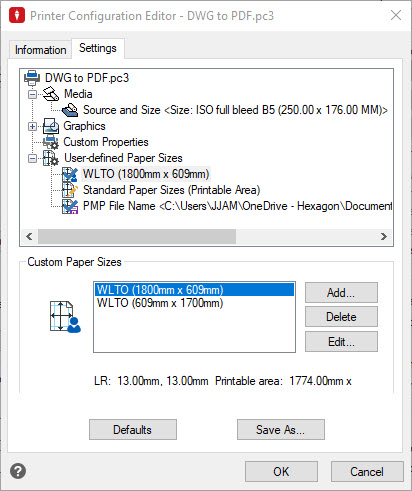
IMPORTANT final step:
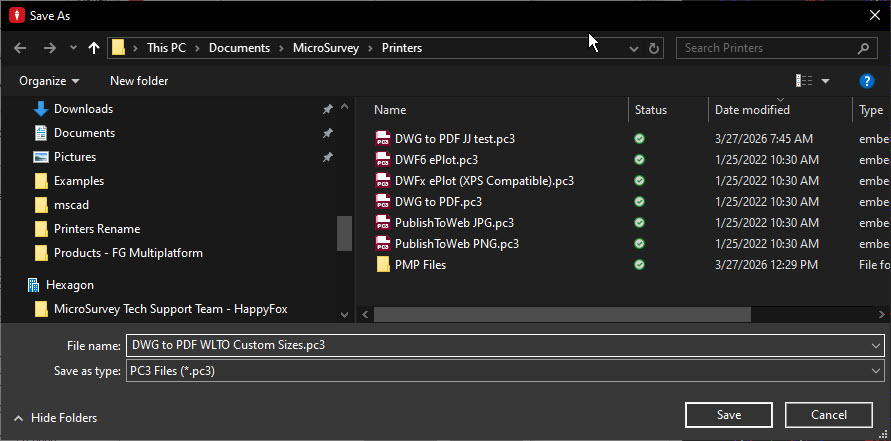
Before closing this dialog, select "Save as..." and save a new PC3 file in the default location:
Using Custom Paper Sizes:
Now that you have created this PC3 file to define custom paper sizes you will be able to use it for prints from your current workstation. The next time you print, select the newly named PC3 file and select from newly defined paper sizes:
pc312.jpg

The PC3 file will be stored in: .\Documents\MicroSurvey\Printers
If other members of your organization or other people who log into your workstation under different accounts require this file, mail it to them and tell them to find the same folder on their PC and copy the file there.
James Johnston
Comments