To finish off a drawing you require a Title Block to be placed around your job. There are several different ways that you can accomplish this. Below are some of the different methods to get a Title Block in your drawing.
1)We supply you with a command called"Sheet and Title Block"found under the Options pulldown menu. Below is the dialogue box that comes up.

There are two methods of inserting a Sheet and Title Block 1) Layout Mode Viewport 2) Simple Insertion.
Simple Insertion:
Pick the Sheet Size to match the size of paper that you wish to plot to. You may choose from a preset size or you can enter in a custom size. In this example I am working in Imperial and using a paper size of 17"x11". The Length X is shown as 17 and the Width Y is shown as 11". If you are working in Metric then you will have metric paper sizes to chose from such as A1, A2 etc.
Once you have selected the paper size you can also set the margins to match the plotted area that your plotter/printer permits. This will allow you to draw 2 rectangles, the larger one representing the paper size, the smaller one to represent the plotting area within the paper. You can set each of the 4 margins separately via the Top, Bottom, Left, and Right options.
Next you can choose from the supplied Titles which will be drawn in the bottom right corner of the sheet. Title-1 is for Imperial jobs, Title-1m is for Metric jobs. You can create your own blocks and save them in the \MSCAD2002\DESIGN\BLOCKS location, then they will be made available from this dialog.
After completing the dialogue box as shown above, you then hit the OK button to continue.
Next you will be asked: Pick where you want the lower right corner of the sheet to be.
This will ask you where to insert the Sheet and Title Block. Pick a location on screen with the mouse. We then draw the Sheet and ask you to fill in the Title Block Attributes. Once filled in they will be added to the Title Block to finish it off.

To fill the attributes in, pick on the item on the left, such as DRAWN BY, then pick on the long white blank at the bottom of the dialogue box, and fill in the correct information. Then pick on the next item in the top left, and so on until they are all filled in. When they are all filled in you can press the OK button. Do not pick on OK until you have completed the entire list.
Now that the Title Block has been completed, you may need to move the Sheet and Title Block to better center it over the actual drawing. You will be asked:
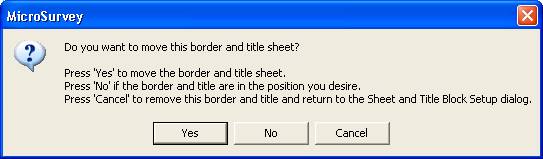
Answer YES to move the Sheet and Title Block to the desired location.

Once you have picked the new desired location the Sheet and Title Block are completed and are now part of your drawing. To edit the Title Block later you must use the"Edit Part Attributes"command found under the Part pulldown menu, or type the command ATTXEDIT.
Here is an example of what the Sheet and Title Block may look like on a job. When plotting you would use the Window option and select the smaller rectangle.

The Title Block, in the bottom right corner, with the attributes filled in, blown up, looks like this:

Layout Mode Viewport:
Pick from the preset sheets sizes. Select a Viewport Scale and determine of the Sheet will be oriented as Portait or Landscape.

Pick ok and the drawing flips to Layout Mode and places the Sheet and Title Block with a Viewport filling the Sheet. The drawing is automatically scaled correctly, as you selected, to show in the viewport.

Explode the Sheet and Title Block and edit/add text as required.

To do any further work in the drawing you will need to flip between Layout Mode and Model Space (the way the drawing was before you ran this command). To do so you can either go under the File menu ->Layout Mode/Model Space, or pick on this button on the left side of the desktop:

2)Another option would be to simply insert a Title Block that you have already drawn. This Title Block could originally be from AutoCAD and be a DWG or DXF file, or you may have drawn it in MSCAD using the line and text commands. (You could use attributes as we did in step 1 but they are a little more difficult to setup and if you have to explode your title block then the attributes loss their information. I would suggest using normal text and simply editing the text after inserting and exploding your title block.) Either way you can insert the Title block by running the"Insert Part"command found under the Part pulldown menu. The following dialogue box will appear. Simply pick on the External button to allow you to search for your title block on the hard drive.

When you pick the External button you will see the following dialogue box.

You can navigate around your hard drive until you locate the title block you wish to insert. At the bottom of the dialogue box you have the ability to chose a FLX, DWG or DXF file to search for and insert. Pick the one that matches your title block.
Once you pick the OPEN button, In the previous dialogue you will see the name of your title block. Set the Scale for the X and Y to the correct value to match the drawing scale. This will depend upon what scale the title block was drawn at and what the current drawing scale is set to. Pick the Exploded button if you wish to have your title block exploded automatically upon insertion. Then pick OK and locate the title block on the drawing as desired.
3)Another method that is an option, would be to use a Template drawing to start a new job. In the Project Manager, as you are starting a brand new job, you can tell the program to use a template drawing. This template drawing could have a title block in it already scaled to the correct size. The only downfall is that the job, when you import it from a data collector, may use a different datum and when you zoom extents to see the job you may think you have an empty screen. What you really have is 2 small dots on screen. One is the title block, probably in the bottom left of the screen, and the other is your job at the datum you set, up in the top somewhere. You need to move the title block to the job (NOT the other way round). Once you do this you can complete your drawing.
4)An advanced method of working with final drawings, which includes title blocks, is the use of Layout Mode (a.k.a. Paper Space). To switch to Layout Mode you need to run the"Layout Mode/Model Space"command from the File pulldown menu, or pick the following button from the left side of the desktop:
This will blank the screen. Paper space is the ability to show the title block at true scale and have small windows (created using the"Layout Viewport Control"command from the File pulldown menu) inside the title block allowing you to see portions of the drawing at a scale of your choice.
To automate this process, use Step 1 above with the Layout Mode Viewport method.
You can insert your own title block as in step 2 above but the scale is 1"=1' in imperial or 1:1in metric.
You can also use step 1 above to place the sheet and title block but you must first set the drawing scale to 1 in the General Configurations dialogue.
Finally, you plot the drawing at 1"=1' for imperial or 1:1 for metric.
5)We do support X-Ref's (another advanced command) for those that were wondering but I would not use this technology to insert a title block. The XLINK command is our X-Ref option. X-Ref's are normally used on portions of a drawing that are in the state of flux and have not been completed yet. A title block is completed and is not in the state of flux. To use the XLINK command would be a waste as you would have to Bind it immediately, thereby converting it to a part (use step 2 above instead).
In my opinion, your own customized Title Block with perhaps a company logo incorporated in it, is probably the best solution but our"Sheet and Title Block"option would be a close second.
Created on: November 26, 1999
Jason Poitras
Comments