Settings Migration Wizard
Transfer CAD and MicroSurvey configurations between versions and workstations using the MicroSurvey Settings Migration Wizard:
- Open the source instance of MicroSurvey CAD or other CAD product
- Open a drawing with all MicroSurvey defaults configured exactly as you prefer. Check this article to ensure you have accounted for all options.
- Open "Job Defaults" from the MsTools Ribbon
- Check on "Set these defaults as Permanent" and select "OK"
- Pick "Yes" to the prompt that follows
- Your MicroSurvey Defaults are now stored in a file named incad.cfg and are ready for transfer to another workstation or another version
- Find the Migration Wizard on the MsTools Ribbon "Defaults" drop-down as shown:
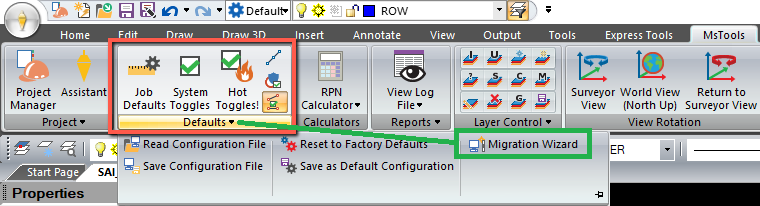
- Run Migration Wizard
- Select "Backup"
- Configure the Migration Wizard as shown:
NOTES:
|

- Select "OK" and a migration file will be created
- Close the source MicroSurvey product
- leave the Migration Wizard file where you created it, or if necessary, transfer the file to another workstation
- Open the destination MicroSurvey product
- Find the Migration Wizard on the MsTools Ribbon "Defaults" drop-down as shown:
- Select "Restore"
- Browse to the Migrations file you created before
- Open
- All MicroSurvey support files and customizations have now been transferred successfully
Important Note about AutoMap Symbols: Now that your AutoMap has been transferred to the new build, any automap symbols you are using will still be sourced from the original location. If you configured your Automap using the sample symbols that were stored in "C:\ProgramData\MicroSurvey\MSCAD\XXXX\mscad\blocks" they will be available for use until you uninstall the older MicroSurvey CAD. If you wish to update the symbols location in the AutoMap it is most efficient to open the csv file in Excel and edit the "D" column to update the path to the required location. This step will be necessary with each update. Alternatively, you can define a custom location for all required symbols on your PC or network and this step will no longer be required. See this article for tips on managing symbols efficiently for your organization.
James Johnston
Comments