See all the Pointcloud training Movies at this page
This Tutorial walks you through the steps of creating a Cyclone database from a non-Leica Pointcloud source.
You must have Leica GeoSystems Cyclone installed to proceed with this Tutorial. If required you can download it from here:
Download Cyclone from this Page
Save this file to your computer, right click and "extract all..."
Then install the program as a free viewer version.
If you want to practice, there are two files you can use:
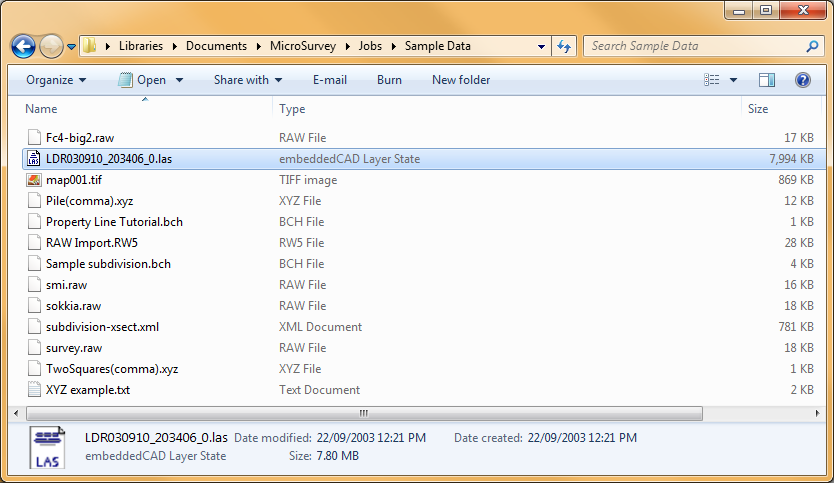
1. There is a small one named LDR030910_203406_0.las preinstalled with your product in:
C:\Users\(YOUR LOGIN)\Documents\MicroSurvey\Jobs\Sample Data
2. Or if you would like to work with the file used in the PointCloud Training Videos please download from this link.
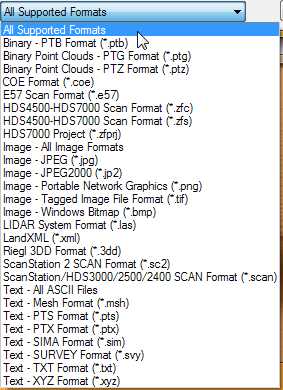
Compatible Pointcloud formats:
If you use a non-Leica branded Scanner or point clouds generated by either photogrammetry software or a third party registration tool you will need to follow this procedure. The exercise will make use of the "Viewer" functionality of Leica Cyclone to create an IMP file, or Cyclone database which can later be imported into Map360. We are using the LAS format for the exercise.
This procedure will allow you to import data from a variety of pointcloud formats. Other available formats include:
Run MicroSurvey CAD
Open or create the Drawing which you intend to import the MsPointCloud data into
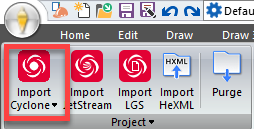
Start Import Cyclone command from the PointCloud ribbon:
This will make a connection to the EpcA engine and connect MicroSurveyCAD to Cyclone. You’ll see a progress bar for several seconds while it establishes this connection.
When the Import ModelSpace dialog appears you may cancel the import command, but it's not mandatory:

Leave MicoSurvey CAD running in the background and launch Cyclone from your Installed Programs:
In Cyclone:
Run Cyclone. (free demo version is fine, license not required.)
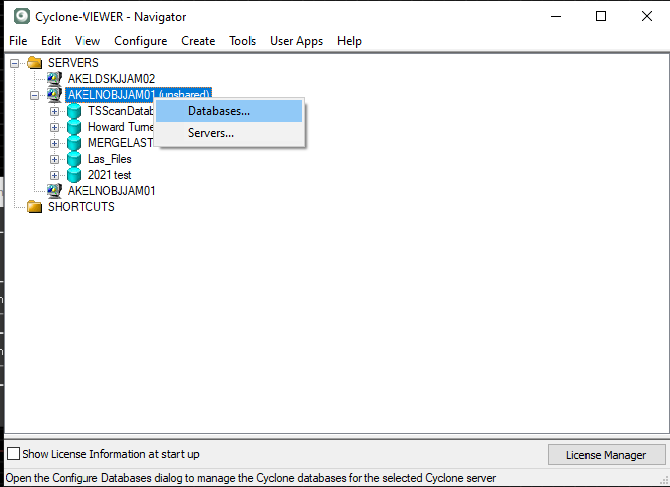
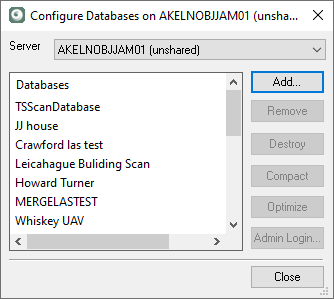
Expand “SERVERS” in the tree
Right-click on the “YOURCOMPUTERNAME (unshared)” database.
Click the “Add” button
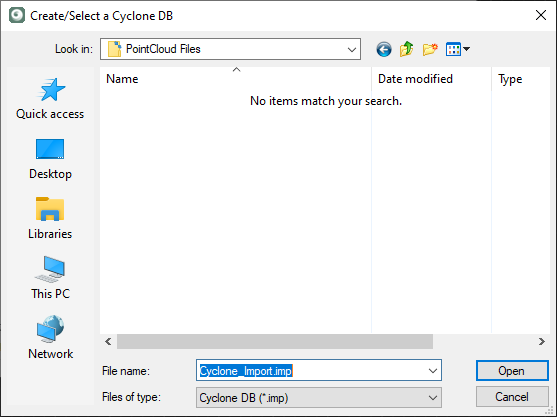
Pick the "..." button and browse to the folder you would like to create your Cyclone database. We recommend creating it in the same location as your original scan file and CAD files for ease of file management in the future.
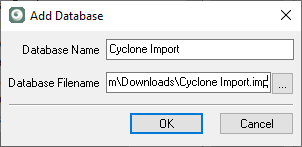
Enter a name for your Cyclone Database (IMP) file and Pick "Open" twice:
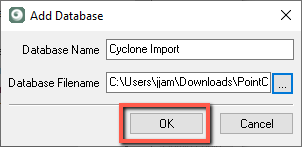
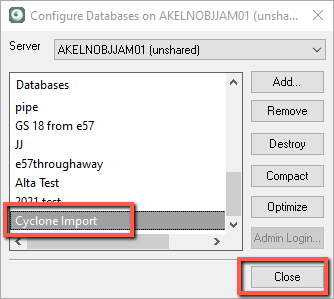
Select "OK"
The new database is added to the list, make sure it’s checked and click Close.
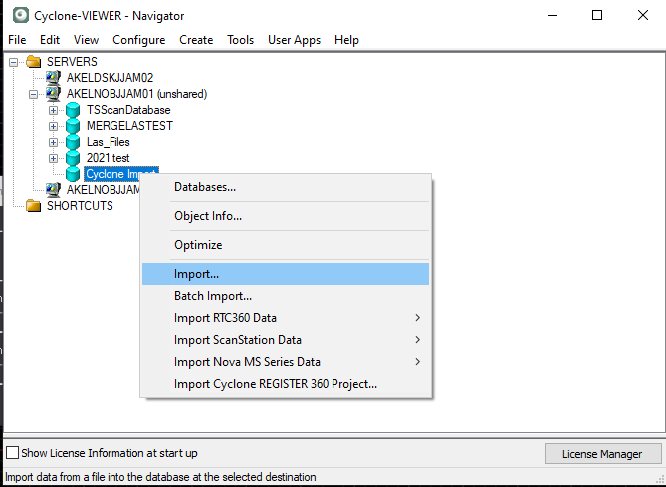
In the Cyclone Navigator, right-click on your new database and select “Import”
Browse to your .las file (many supported formats) and Open it.
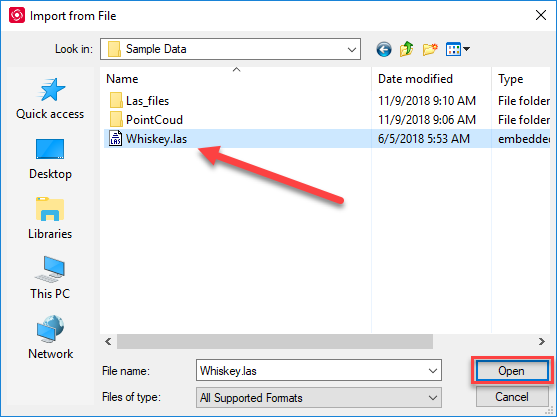
(It may take some time to import, depending on how big the scan is.)
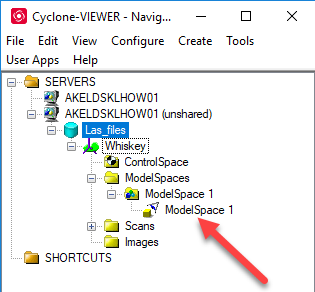
Expand your database, and you’ll see that it created a new “ModelSpace”.
Close Cyclone

In MicroSurvey CAD
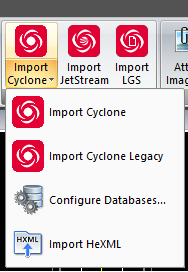
Return to MicroSurvey. You can continue working with the open "Import Modelspace" dialog or, if you've closed it, launch eith "Import Cyclone" or "Import Cyclone Legacy" from the MsPointcloud ribbon:
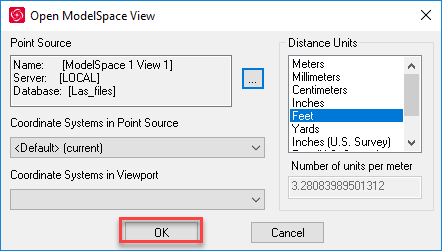
Set the units for your drawing, and pick on "..." to start the import.

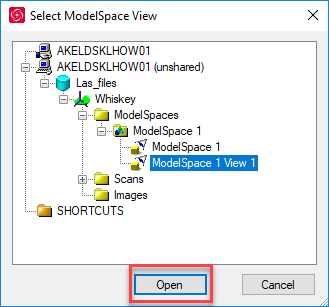
Highlight "ModelSpace View" and select "Open."
Pick on "OK"
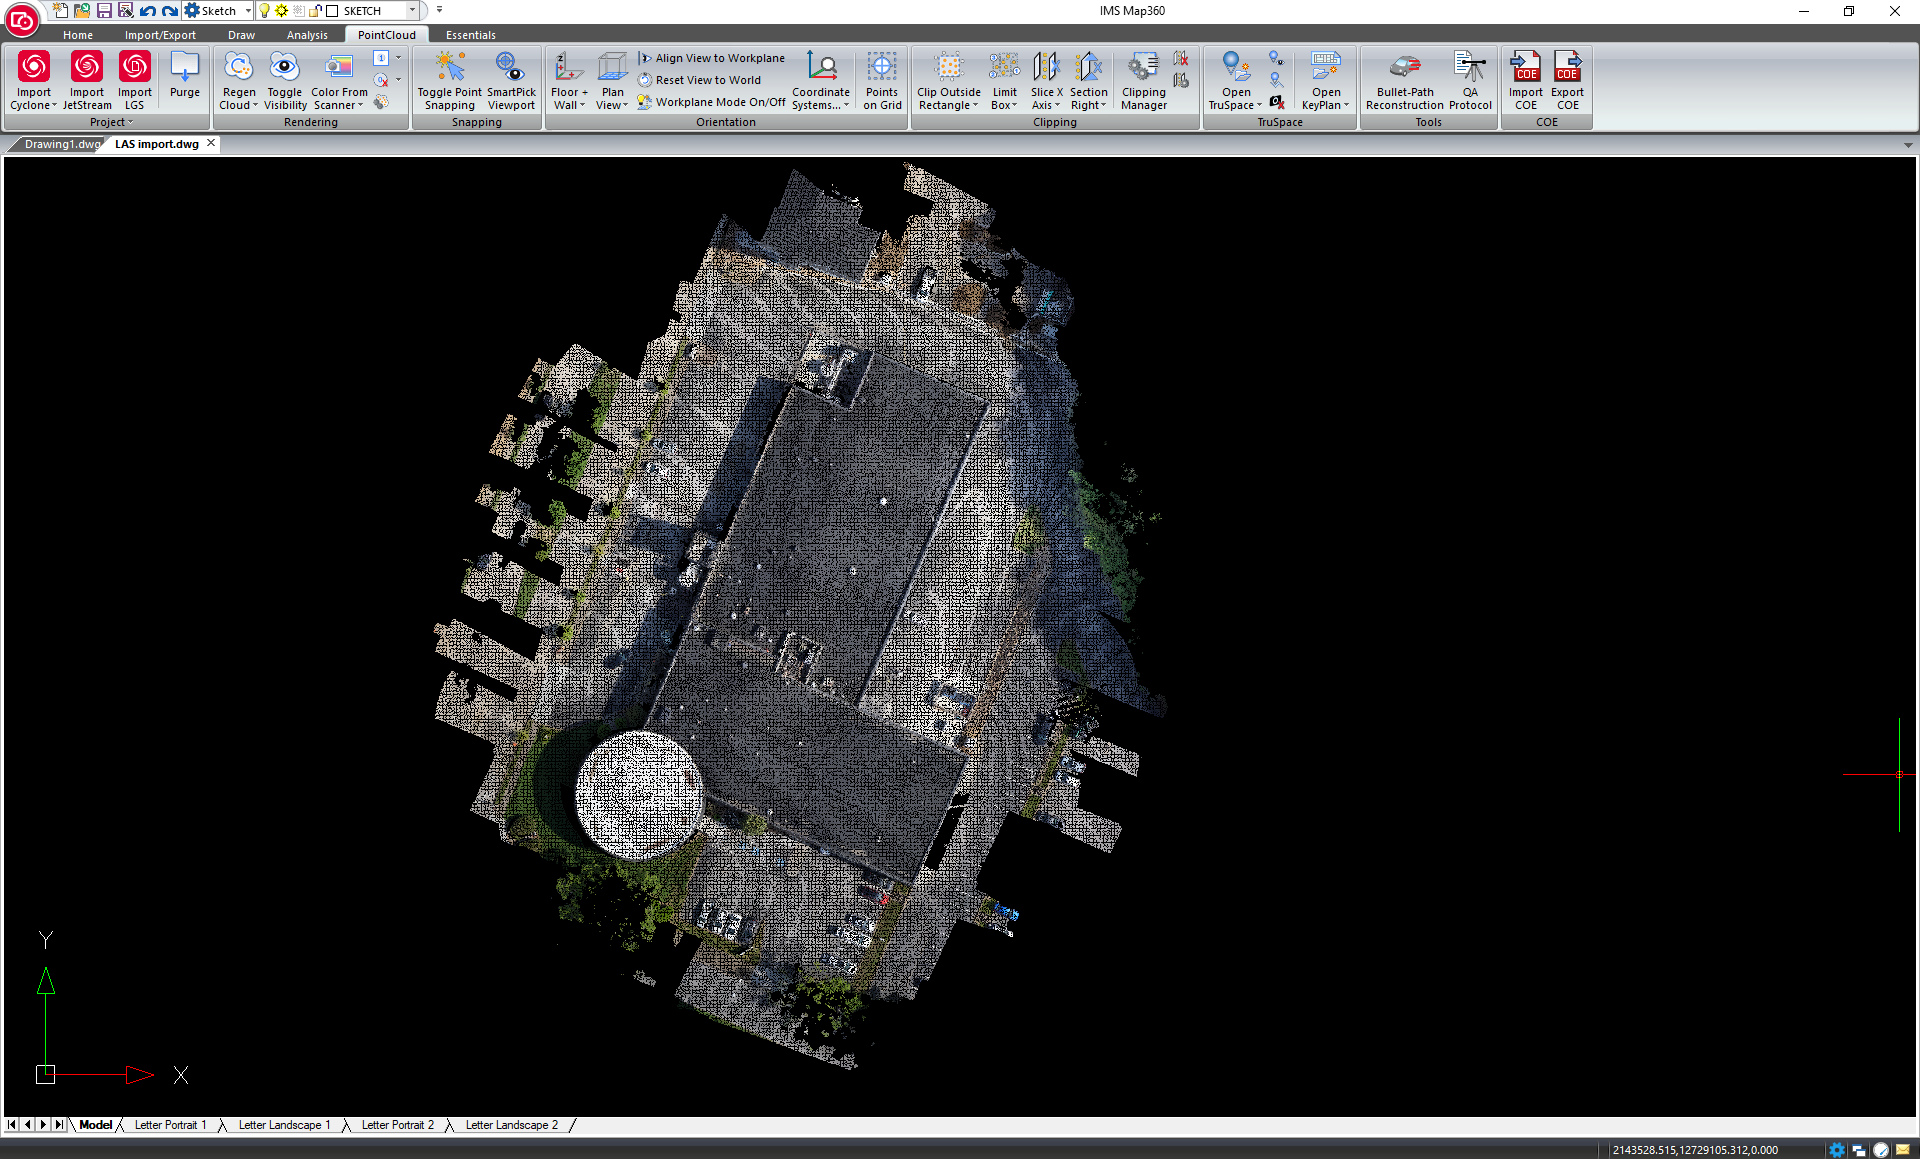
The Result:
A database is now created, and is linked to your drawing
This database is now saved on your computer and available to open into any drawing by running "Import Cyclone" or "Import Cyclone Legacy." You won't need to repeat the import steps.
Troubleshooting Tip: If, after following the process above you see a blank screen, start a new drawing and run the "Import Cyclone Legacy" command and open the imp file you have created.
James Johnston
Comments