IntelliCAD and AutoCAD (the CAD engine used as the basis for embeddedCAD and inCAD) are delivered with a range of Predefined hatch patterns that you can access when you open the Boundary Hatch Dialog:
If you need to create your own hatch patterns, you can modify the hatch pattern definition file icad.pat in a text editor by copying it from its normal location, making changes, and replacing it:
C:\Program Files\MicroSurvey\MSCAD****\patterns\icad.pat
C:\Program Files\MicroSurvey\embeddedCAD ****\UserDataCache\en-us\Support\MSEmbed.pat
C:\Program Files\Autodesk\AutoCAD ****\UserDataCache\en-us\Support\ACAD.pat
NOTE: Hatch pattern definition files can be exchanged between IntelliCAD and Autodesk products.
The hatch pattern definitions are mostly coordinates, see below for how the ANSI134 pattern is defined:
*ANSI34,ANSI Rubber, Plastic
45, 0,0, 0,0.75
45, 0.176776695,0, 0,0.75
45, 0.353553391,0, 0,0.75
45, 0.530330086,0, 0,0.75
The formatting of the pattern definition is described briefly in this article from AutoCAD:
The process of defining the hatch patterns can be tedious, but an open source lisp routine is available that makes the hatch pattern definition a simple process.
Visit the CADalyst website to download their Hatchmaker.lsp routine:
*NOTE: embeddedCAD does not allow the use of lisp routines. You will need to use either inCAD or MicroSurvey CAD to create hatch patterns.
- Instructions to follow in MicroSurvey CAD or other IntelliCAD based product:
- Start a new drawing.
- Set your current layer to 0 and your
- Set your current linetype to continuous.
- Load the new lisp file (see this article for details)
- type DRAWHATCH in the command line
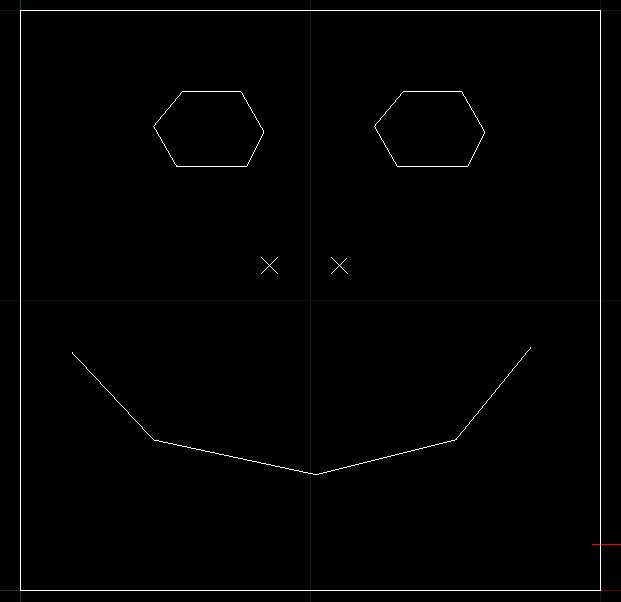
- A dialog pops up informing you that you can draw points and lines to define the hatch pattern. You must work within the square shown and leave the snap settings as they are:
- When finished, type SAVEHATCH
- A note appears reminding you that your lines must correspond to the limit and snap settings mentioned in step 7
- <Enter>
- You are now prompted to select the entities inside the box that define your hatch pattern.
- Select all the lines and nodes, but not the box
- <Enter>
- The contents of your hatch pattern definition will appear in the command line. (TIP: If you want to manually edit your *.pat file you can copy this text directly into the text editor, but in this document we'll follow the automated process)
- A prompt appears: Briefly describe this hatch pattern: Type a comment for your hatch pattern
- <Enter>
- A prompt appears so you can set the name for the *.pat file.
- Browse to your desktop
- Type the exact name of your new hatch pattern. Use all capitals and include no spaces.
- A message appears: "Your Hatch pattern is ready to use."
- Next, we need to create a slide file so that you can view a thumbnail of your hatch pattern in the bhatch dialog.
- type CONFIG
- Pick Display
- Colour scheme
- Select Background
- Change background colour to white
- Turn off display of grad
- Type MSLIDE
- You will be prompted to save the file. Navigate to your desktop, and assign the same name you used in step 19
-
Now close MicroSurvey CAD. View your desktop, and you will find two files:
- HATCHPATTERNNAME.pat
- HATCHPATTERNNAME.sld
- Copy your original *.pat file from the program files location mentioned at the beginning of this article onto your desktop.
- (Just to be safe, create a backup of the original *.pat file)
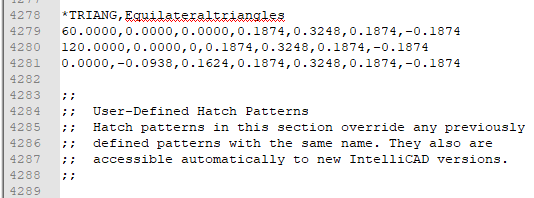
- Open the original *.pat file in a Text editor. At the bottom there is a space for you to add new definitions:
- Open your new HATCHPATTERNNAME.pat file in the text editor
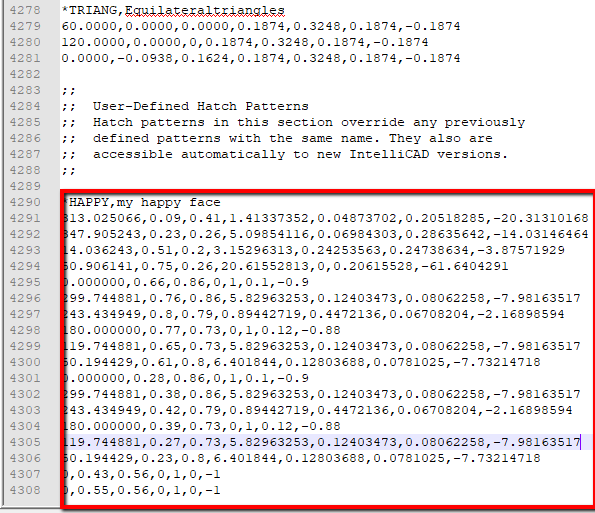
- Copy the contents of the file into your original *.pat file:
- Save the *.pat file on your desktop
- Copy the *.pat file into its original location
- Copy your *.sld file into: C:\Program Files\MicroSurvey\MSCAD2020\patterns
- Start MicroSurvey CAD
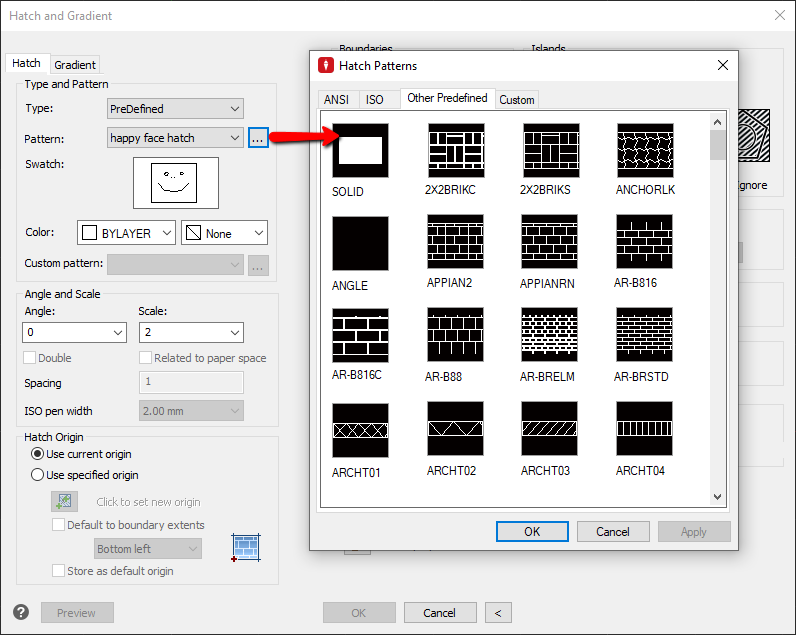
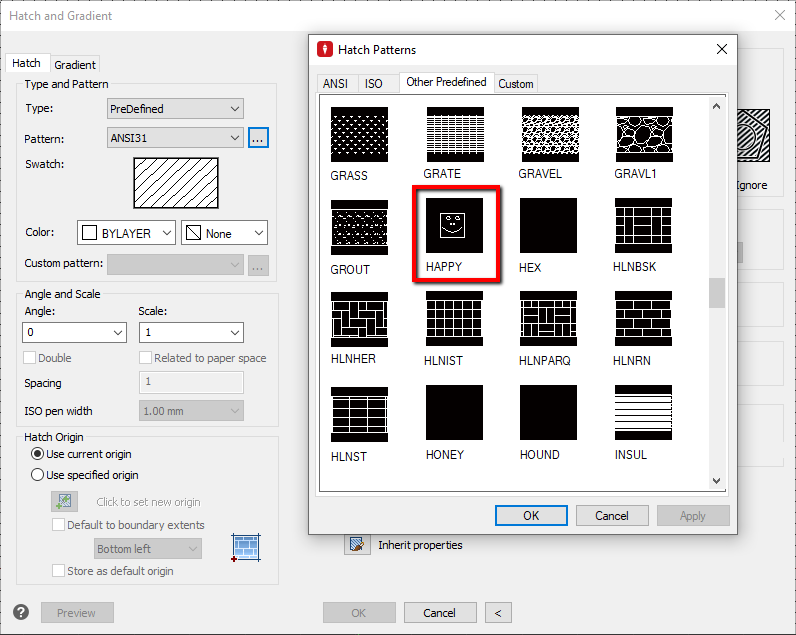
- BHATCH
- You should now be able to find your hatch pattern in the "Other Predefined" group:
If you wish to share your customization with other users in your office, simply distribute the *.pat file and any *.sld files you have created. Restart the program to have your changes take effect.
James Johnston
Comments